
Some advantages of making your own bases are that they are cheaper than those commercially available, and they can be made from all sorts of exotic woods.
To make bases you will require the following:
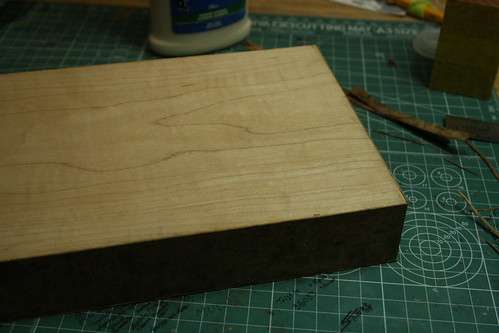
-Various sizes of wood blocks to cover with veneer. I try to make all the bases at least 1 1/2 - 2 inches thick.
-An assortment of different veneers. My favorites are birds eye maple, walnut burl, maple burl, any sort of nice burl...
-Stainable Wood glue.
-A sharp knife, such as a model scalpel with #11 blade.
-Sanding blocks.
-Clamps.
-A large flat surface like table that you can clamp onto.
-Wood finishing products, such as stain and lacquer clear coat.
Step 1: I decided to make the base for my Panther from Walnut Burl:

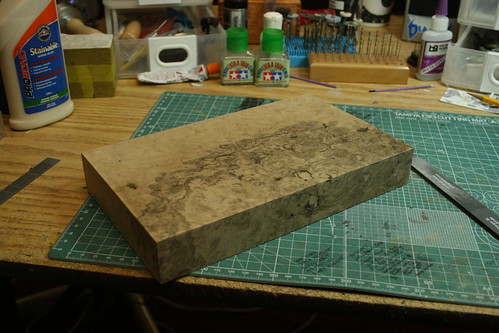
Step 2: Apply the veneer to the wood block, start by doing the edges, cover the area where you are applying veneer with a thin coat of stainable wood glue.
Step 3: Once the base is covered with veneer, sand, making sure to take the arris off the edges and remove and excess glue. I used a 200 grit sandpaper and worked well, but you could go finer. Make sure not to sand threw the veneer! (note: I did not use the sanding stick in the photo for this, except for removing the arris)

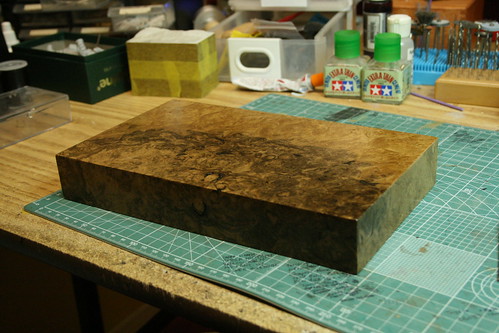
Step 4: Stain and varnish. For this base, I liked the natural colors of the wood and decided to just apply 4 coats of fast drying polyurethane from a spray can. I think the natural colors in this case look excellent.
Step 5: I had a friend at the local framing shop do a black frame around the bottom for the final touch. A frame like this is usually very cheap and takes them about 5 minutes to make on the spot.

Step 6: Apply model ;-) I will also have a name plaque done at some point when the figures are painted.
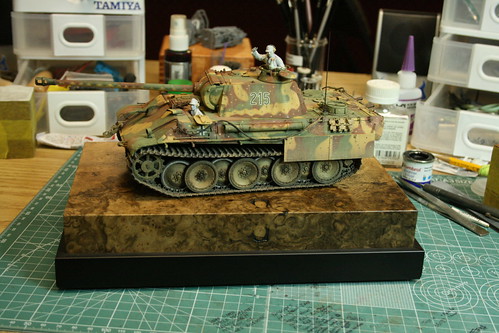
The end result is worth it. Any model you have spent large amounts of time researching, detailing, and painting deserves a nice base to be displayed on.
I agree about the base idea though II would possibly go for a rougher groundlike texture where the tank actually sits personally, I do love the marble like finish you got and I think for a 1/12 scale model of a historic character like Napoleon or even a grenadier guard, I will use your method so thanks
ReplyDeleteMiky of www.mikysmilitarymodels.co.uk